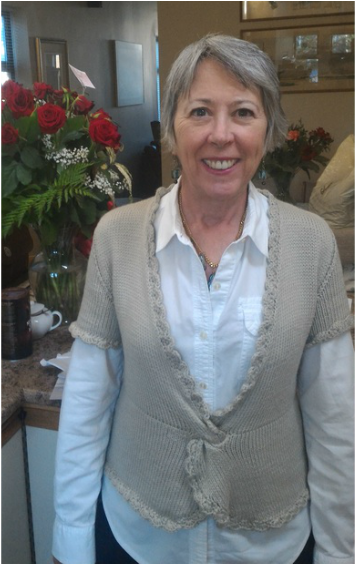
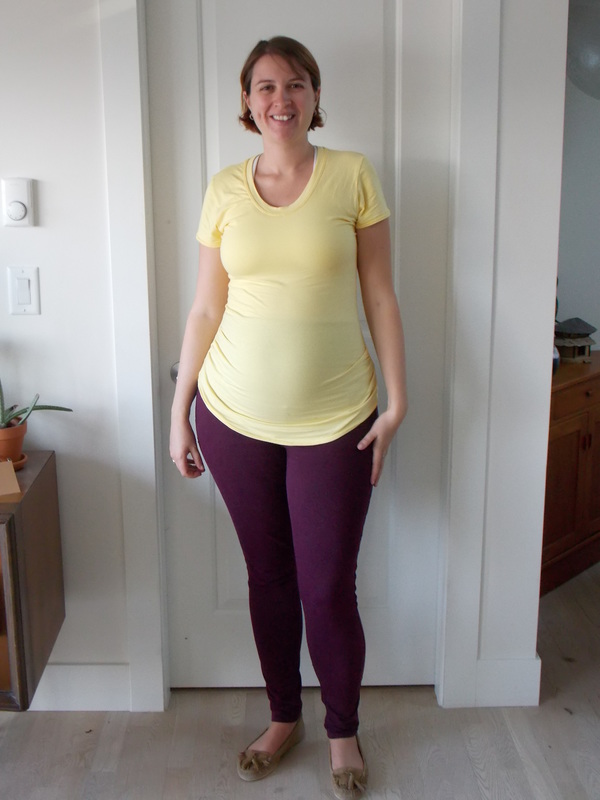
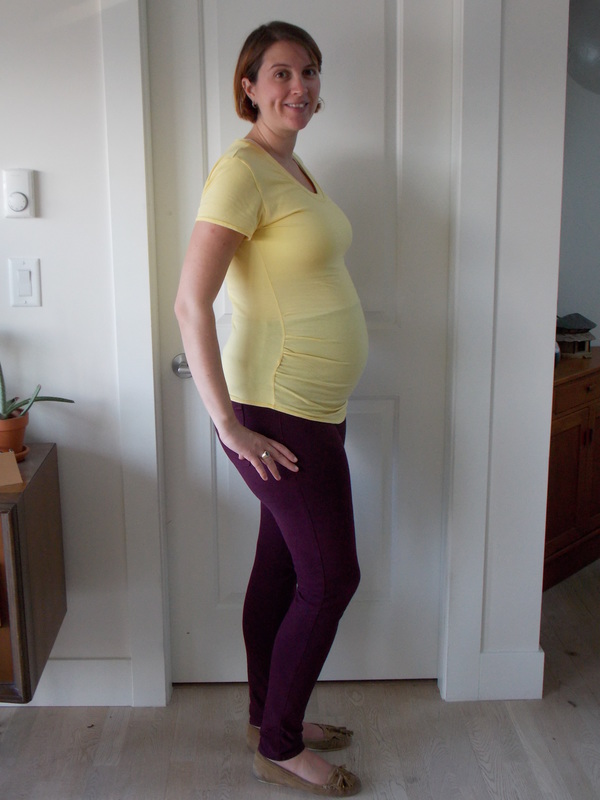
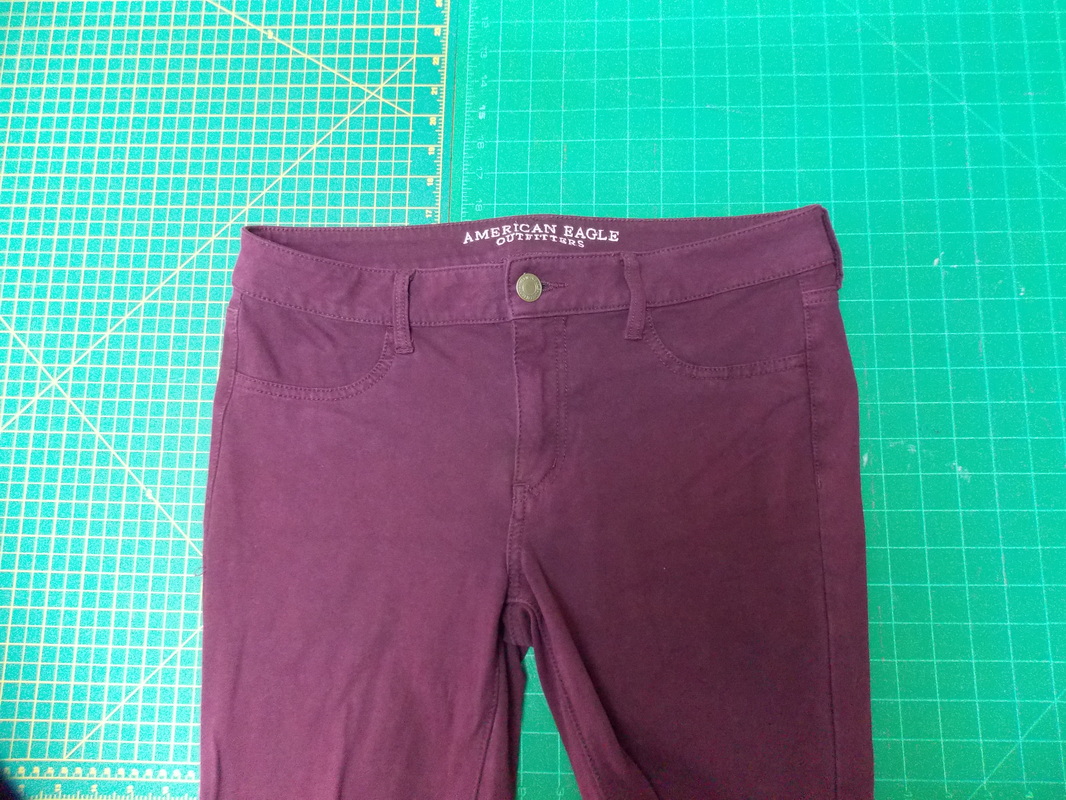
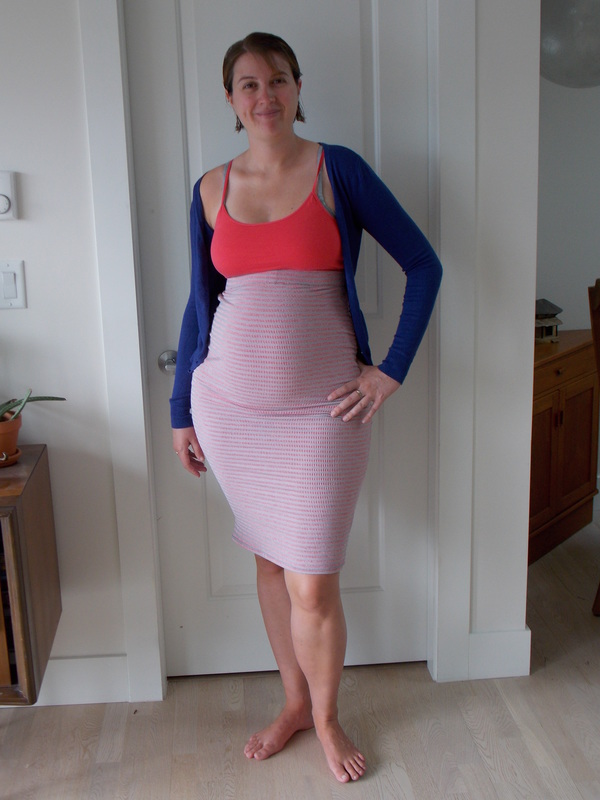
My Mom plans to style it this way with a solid or printed collared shirt in the fall and with a camisole or t-shirt in the spring and summer.
Do you ever finish gifts super late?
Knitting a ranch house |
|
This is a knitting project that is long overdue. My Mom not so subtly handed me a copy of this pattern that she had admired on a co-worker months ago. I thought I had plenty of time and ordered the yarn to make it 2 months before her birthday. I even made really good progress on knitting the whole back in a week or so. Then I got super nauseas and tired and even though it is not hard to sit on the couch and knit, it felt impossible and this project stalled to a halt. So here it is, 3 months late. My Mom plans to style it this way with a solid or printed collared shirt in the fall and with a camisole or t-shirt in the spring and summer. 
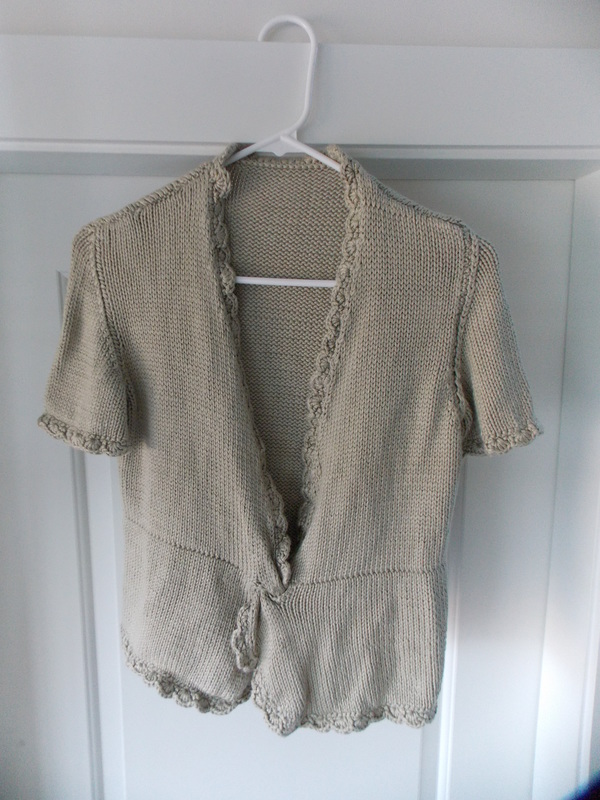
This is the very creatively named "short sleeve top" from Vogue Knitting Spring/Summer 2005. Ravelry link here. It's quite a simple design with a twisted front feature and crochet edging along the edges and sleeve hems. It is not a challenging knit at all but I found that the instructions were a bit unclear to me. I wonder if it was to save space in the magazine that caused the instructions to be quite concise. Everything was there it just often took a bit of figuring to know what was meant. For example, it would be written to follow a certain decrease pattern for the shoulders and then mention while at the same time to follow a pattern from another section of the instructions. I felt like this led to a lot of jumping around for a basic pattern. I wanted this to be simple TV knitting, as it's mostly stockinette, so I ended up writing out the instructions for myself line by line so I could pay less attention. 
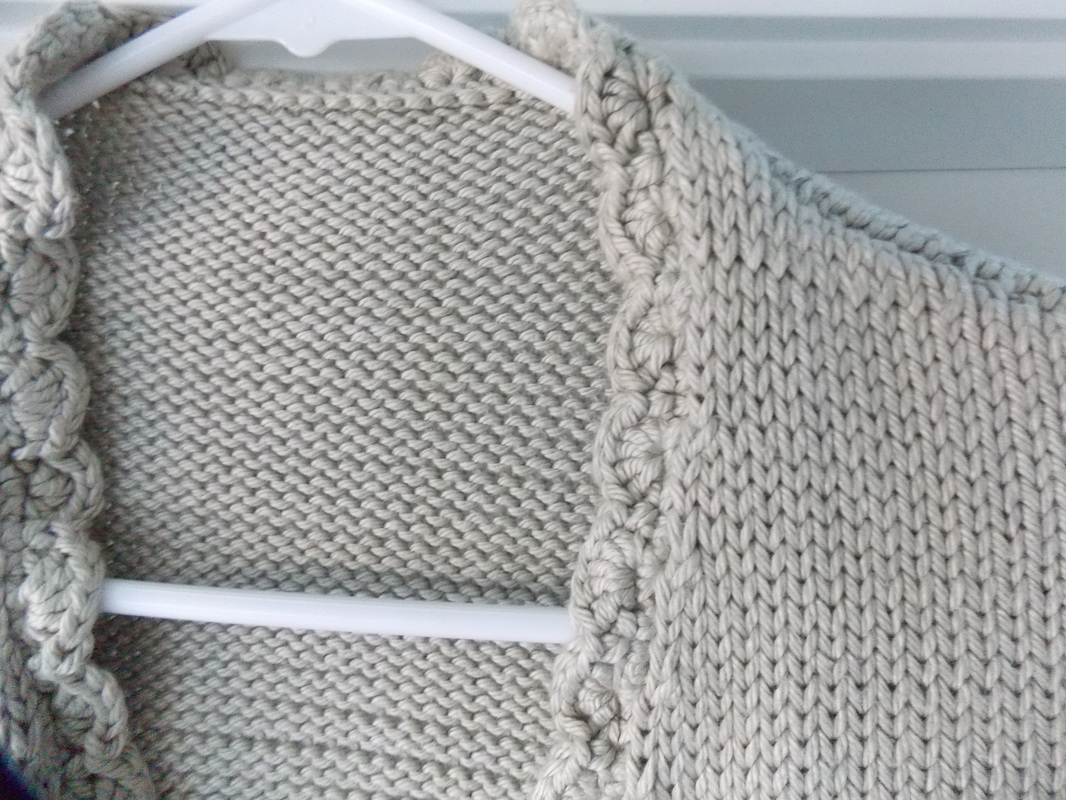
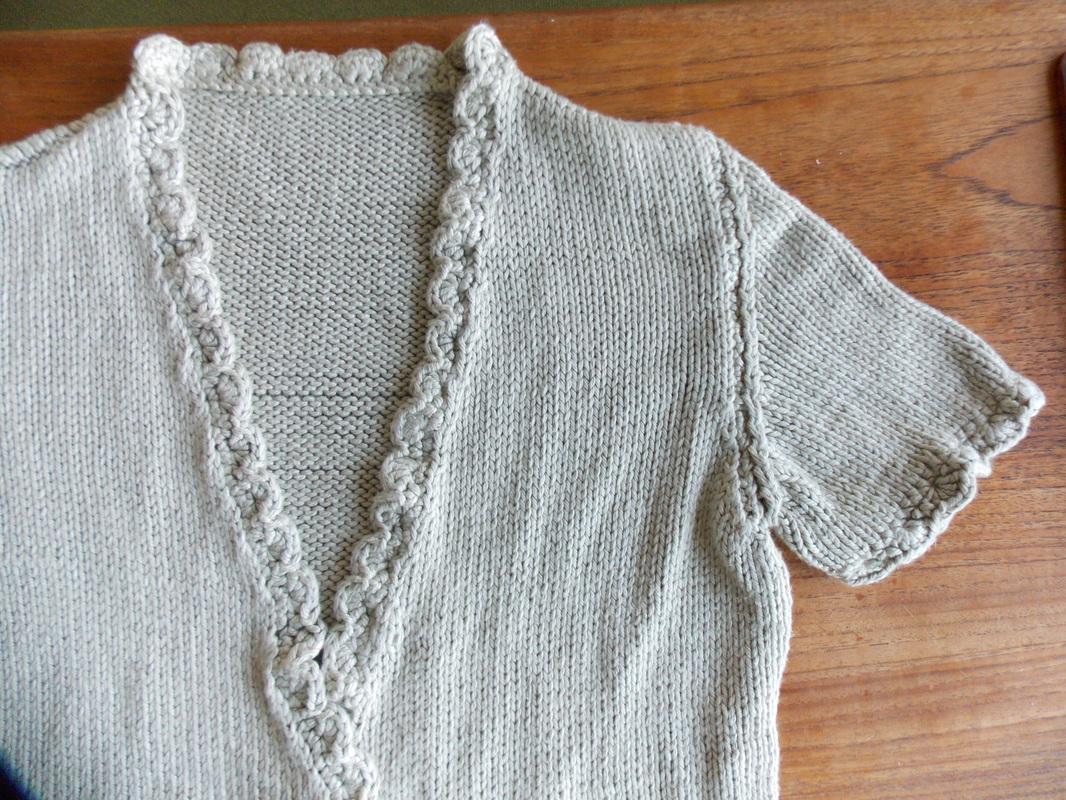
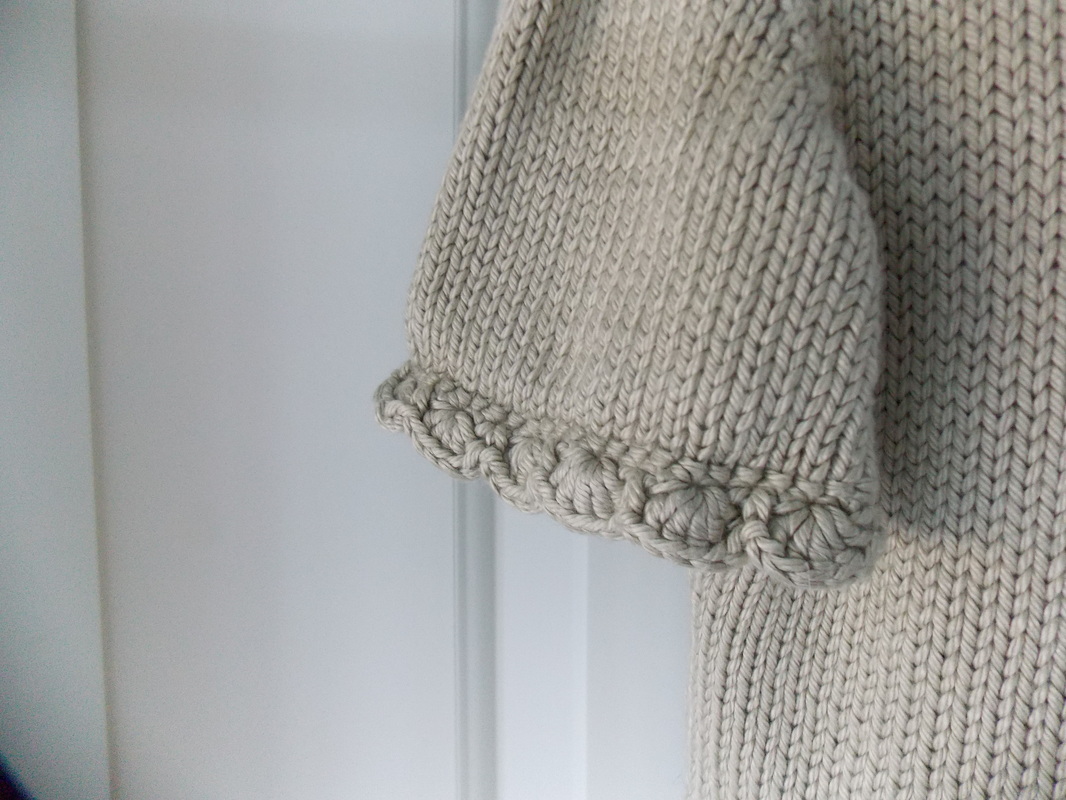
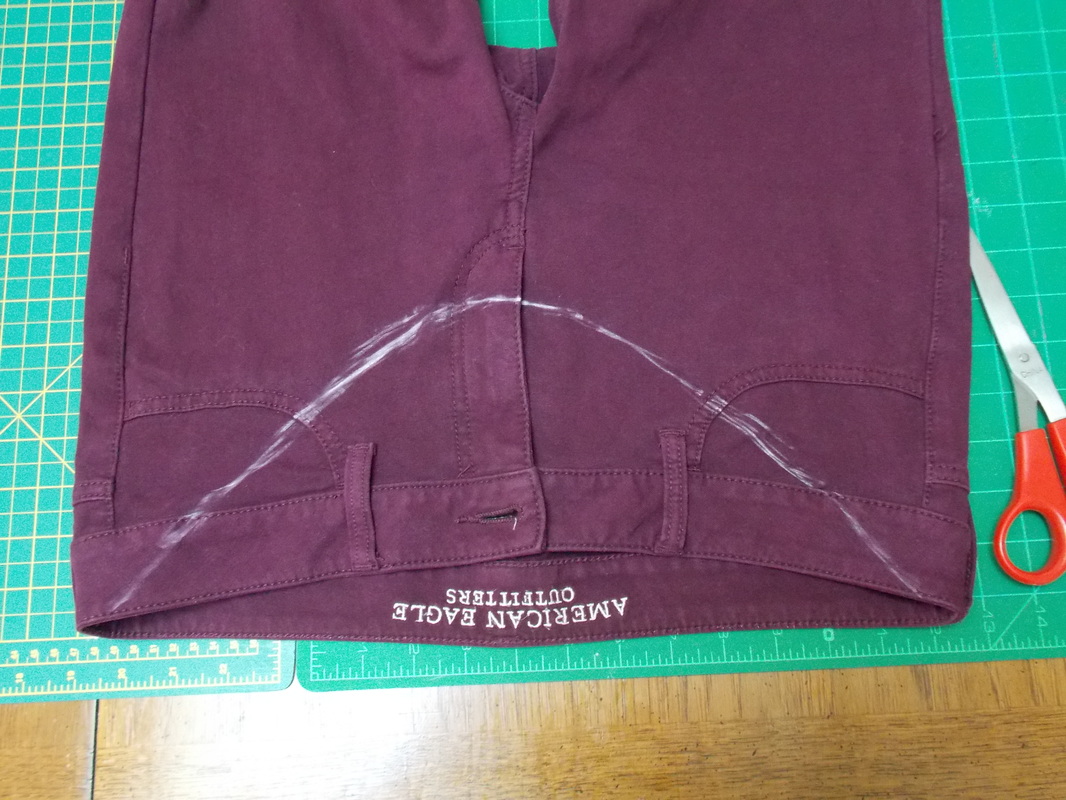
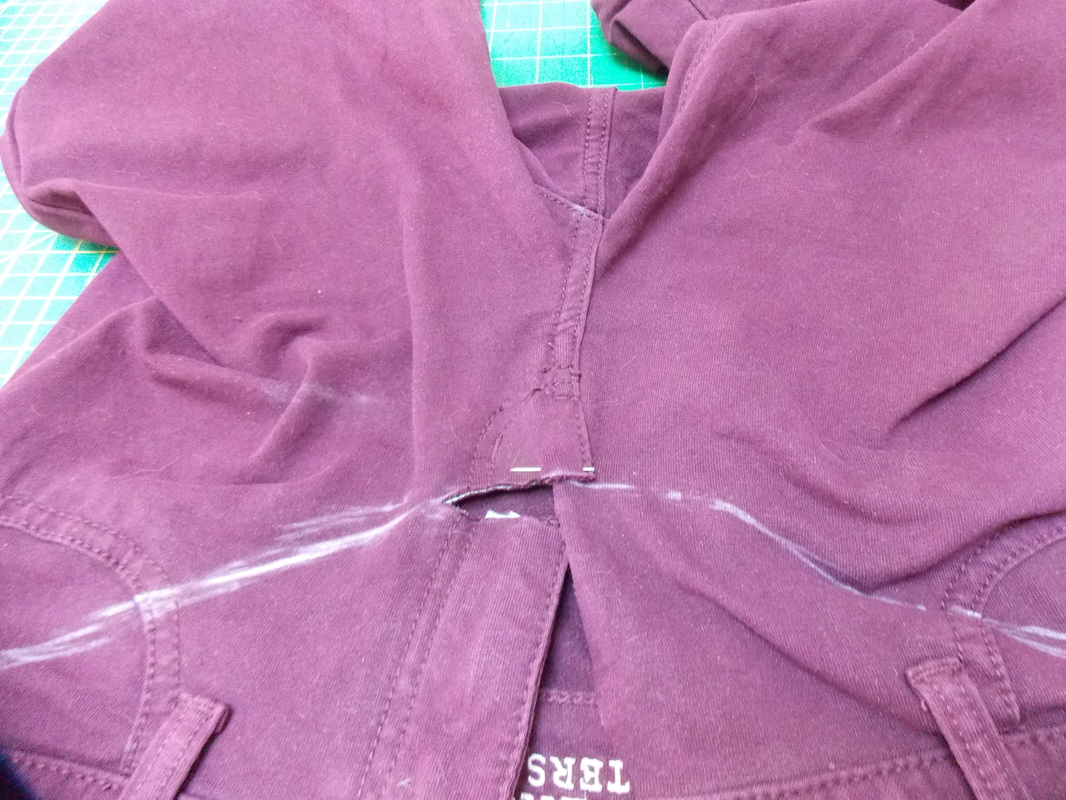
The only change I made to the pattern was to add sc crochet edging to the keyhole that the twist goes through to strengthen and tidy this area as I found the knitted section without it was getting pulled to leave gaps between stitches. A criticism of the pattern is that the twist feels a bit bulky (this was even before the crochet reinforcement). Once the scallop edging is added it feels too wide for the hole it is meant to pass through. 
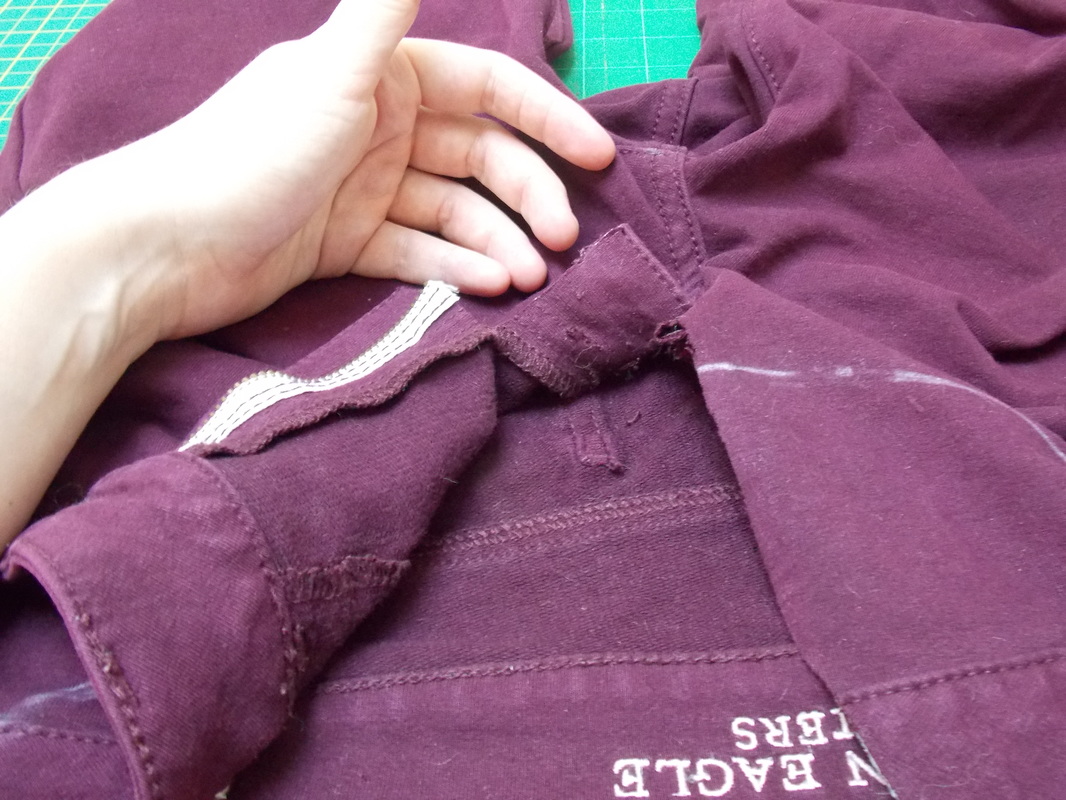
The crochet edging was a new technique for me. A bit of Youtube research and I was fine though. I'd say that the finishing (seaming and crochet) took just as long as the knitting of the body of the garment though. It does look a lot more polished with it, so I'm glad I stuck to it.
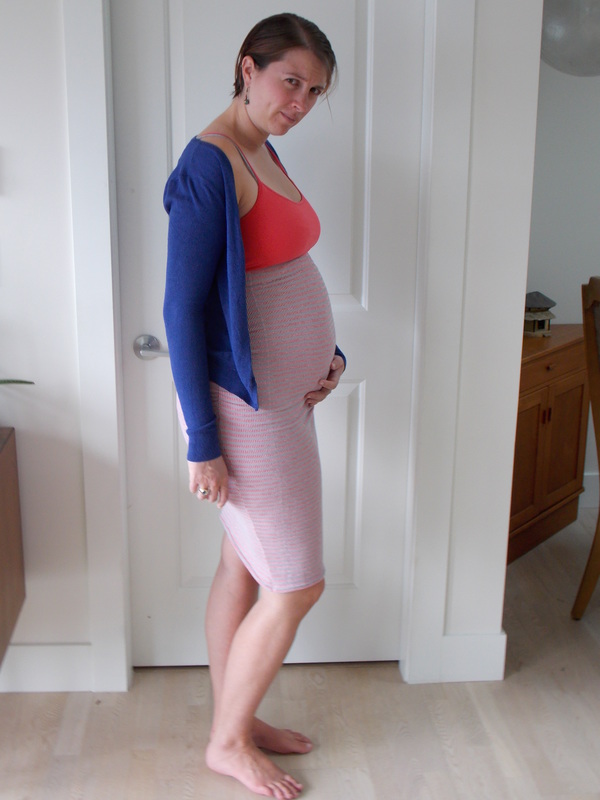
 I did not use the very luxurious Empire Silk as suggested in this pattern. It was hard to find and quite pricey if I could. I ended up using Knit Picks Shine Worsted which is a cotton/tencel blend that has a nice drape and shine to it. It also makes it a little easier to wear day to day and the care is a little easier. I love the buttery soft feel of this yarn. It has a beautiful sheen to it as well. Like all cotton it is certainly heavy when wet but it's not too stiff to be unpleasant to knit with. This yarn is the colourway platinum. It looks more like a beige/grey to me, but it is a nice neutral that will pair well with my Mom's wardrobe.
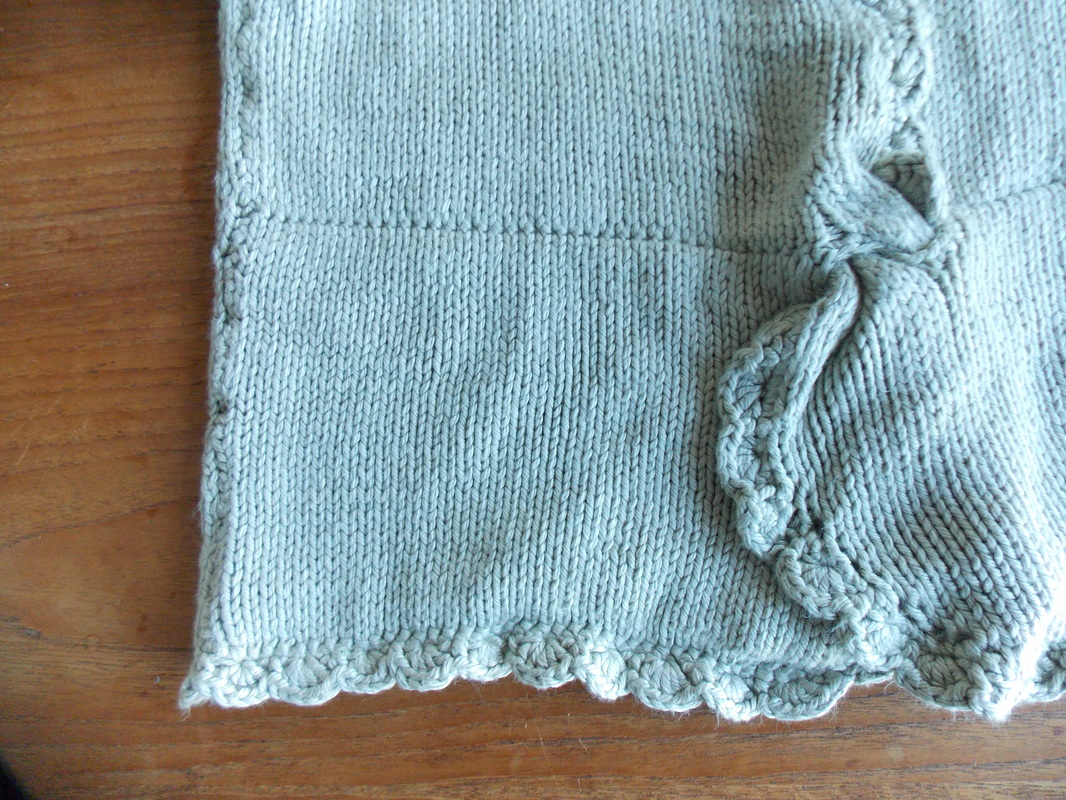
 I was starting to really hate this project during the finishing stages. It was more complicated than it should've been and I hate feeling so behind on a deadline but I'm very happy with the end result. Even better, my Mom seems to be happy with it, which makes it all worthwhile.
Do you ever finish gifts super late?
2 Comments
So while this picture is exactly the same one at the top of my last post, it's all about the shirt today. I have often been told in the past month that I don't look pregnant. I don't know why people think this is any less offensive than saying "you look huge." The comment either implies that I am bad at being pregnant and am underweight or that they thought I always looked like I was smuggling a bowling ball around under my shirt. I think people are easily deceived by empire waist dresses. In preparing to take the bus the other day, I was feeling really tired and wanted to make sure I'd get a seat, but no one is going to give a seat to someone who is ambiguously pregnant. This shirt to the rescue. No question, this shirt makes you look pregnant. It totally worked. This is the Cara Maternity Shirt from Megan Nielsen Patterns. It's a basic t-shirt pattern with various sleeve lengths included. I'm sure you could adapt any t-shirt pattern to maternity but this one is included in the maternity survival pack and it was nice to have this done for me already. I chose a size medium without adjustments based on my pre-pregnancy measurements as suggested and I think the sizing worked out just fine. I found the instructions clear and helpful and the shirt very easy to construct. I added my usual t-shirt construction steps such as stabilizing the shoulder seams with clear elastic and top stitching the neckband down with a twin needle which were not included. I gathered the side seams as instructed by basting a couple rows of stitching in and gathering but I found this gave me fairly uneven gathers that were a bit finicky to sew. Next time I would use a length of elastic and stretch it while sewing the side seams for a more even gather as I liked this result in my Erin Maternity Skirt. I used some organic bamboo jersey that I had originally purchased to make a Nettie Bodysuit. A body suit is not in my near future but I'm glad I used this fabric. It is so soft and comfortable, which is all you want when it feels like your skin is so itchy it's going to split and you're going to deliver alien style...can't imagine that month 8 feels better.
Ever played the pregnancy card on the bus? So I imagine that there are plenty of maternity pant tutorials out there and also a number of patterns. I've seen a few where you add a band to the top of your pants and others where you can replace your pockets with elastic for a lower rise style. I was given a couple pairs of maternity pants and tried these styles and found that my belly starts protruding below the bands on these pants and so when I decided to convert some of my pants to maternity pants, I did it a little differently. I'm sure this also exists on the internet, but here's how I went about it. I chose jeans that had a fair amount of stretch to them for comfort. I did this to some jeans I already owned that I didn't feel were worth saving as I've already worn them in quite a bit and also bought a couple pairs of stretch jeans from the thrift store. I tried on each pair and marked the bottom of where my belly started to protrude and meant that I could not bring the fly further up with some tailor's chalk. I then drew a curved line connected this point to the top of the waist band above the side seams. I cut along this line, carefully cutting through the zipper. I removed the zipper left on the jeans using scissors and a seam ripper. If you try and sew through the zipper you break your needles on your machine. Ask me how I know this. This is a different pair of jeans. You can see here that I pinned the pockets to the front leg piece to keep everything in the right spot while I was working. Also note that it's wise to cut so you don't end up having any rivets in your seam allowance. This will also break your sewing machine needle. Ask me how I know this. To make a pattern piece for the front of the belly band, I took some tracing paper and traced half of the shape of the cut out onto it. I used the centre back seam to draw the mid line. To add the portion that goes over the belly, I extended the mid line 5 inches. 5 inches is just personal preference for how high I wanted my band to be, you can do whatever length you find most comfortable. I extended the side of the pattern to the same height but tapered in by about half an inch at the top to keep the pants snug. To make the pattern piece for the back of the belly band, I traced the front pattern piece excluding the front cut out. I added marking to cut along the fold and to cut 2 of each to each pattern piece. I cut 2 of each front and back on the fold. I used a stretch technical fabric that was quite soft. It feels like LuLu Lemon leggings fabric. You want something with a fair amount of stretch (>40%), that feels good against sensitive belly skin, has good recovery, and breathes (no one wants a sweaty stomach). The stretch should run horizontally along the waistband. Pin (using ballpoint needles) the 2 front pieces together with right sides facing. Serge (or you could zig zag) along the top edge. Pin the 2 back pieces together with right sides facing. Serge (or you could zig zag) along the top edge. Pin the front and back pieces together with right sides facing and serge along the straight edges on each side making a tube. Turn right side out. You now have a tube that looks like this in the front when folded in half at the waist seam. Pin belly band to to the jeans along the belly cut out and along the waist at the back of the jeans. Make sure to remove the pins that you used to keep the pockets in place so you don't sew over them. It looks weird and ungainly but the stretchy fabric makes it easier. Sew along the pinned edge using a serger or zig zag stitch. I used a serger but it was a bit bulky and messy at times, you might have better control with a zig zag. All done! It looks super weird without a shirt but you could also use matching fabric to minimize that fact. I did about 5 pairs of jeans assembly line style and it only took a few short sessions. I realized after the fact that I now have 1 pair of black jeans and 4 pairs of jeans in various shades of red/pink/purple but we'll call it a planned wardrobe decision. Have you ever made your own maternity pants? What worked best for you?
I've been whipping up some quick knit projects after discovering that I have A LOT of knit scraps. Nothing epic but a few lessons learned along the way. More Rosy Lady Shorts made from fabric leftover from t-shirts. The lesson learned here was to use stretch lace with good recovery. Also, I zig-zagged the elastic together instead of serging it. I found the serged seams on the stretch lace on my other pairs tend to unravel. Likely my final Erin Maternity Skirt, as I only need so many. This one is made from some striped rib knit from Our Social Fabric. Here I learned not to sew when tired. I originally sewed the waist band to the hem of the skirt. I even added the elastic for ruching on the wrong end and hemmed the waist band. I spent a good solid 2 hours unpicking all of that. The skirt itself probably only takes an hour. More baby pants in scraps. The first two were from my mom and the second two were from Our Social Fabric. I found the serged seams always looked a bit sketchy at the end of the cuffs. I actually took the time to weave them into the seams using a darning needle that I use for knitting. This looks so much better and makes me feel like the seams aren't going to start pulling apart. Made any small improvements to your sewing lately?
|
AboutA blog to document my attempts to create a well-fitting wardrobe for myself and my family through sewing and knitting. Archives
August 2018
Categories |